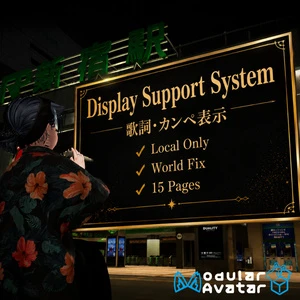
A display for lyrics and cue cards
Keep your lyrics and cue cards close at hand.
An avatar display that shows images of lyrics, scripts or running orders only to you in VRChat. Switch between up to 15 prepared pages and control the display size and World Fix from the menu.
Getting started
Three sample images are included. Pages 4–15 are slots for your own images.
Replace images →Check the follow target →Watch the setup video ↗
01 / BEFORE YOU START
Requirements
Prepare the following tools in your VRChat avatar editing project.
| Required tool | Version / purpose |
|---|---|
| Unity | 2022.3.22f1 (as listed in the included setup guide) |
| VRChat SDK Avatars | Used to build and upload VRChat avatars. |
| Modular Avatar | Used to integrate menus and animations. |
| lilToon | The shader used by this product’s materials. |
Modular Avatar integrates menus and animations; lilToon renders the display. Install these dependencies before importing this product’s package.
02 / SETUP
Installation
- Back up your project
Save a copy of the project to preserve your avatar edits and image settings.
- Import the package
Import the included
.unitypackageinto Unity. - Place the Prefab directly under the avatar
Drag
Display Support System.prefabfromAssets/n72room/Display Support System v1.0/06_Prefabdirectly under your avatar in the Hierarchy. - Configure images, follow target and placement
Use the steps below to set your images and adjust placement for your avatar. Also check that the follow target is assigned correctly.
- Upload and check
Upload your avatar as usual. Select a page from the Expression Menu in VRChat and check OFF, size adjustment and World Fix. The initial display state is OFF.
Your avatar
├─ Armature
└─ Display Support System  ← Place directly under the avatar
This hierarchy illustrates placement only. Avatar names and structures vary between projects.
03 / YOUR PAGES
Set up images
Prepare images of the lyrics, cue cards or running orders you want to display. The original setup guide recommends 1920 × 1080 px.
- Import images into Unity
Add your images to the Project. Keeping them in the product’s
04_Texturesfolder makes them easier to find during setup. - Select the corresponding material
Select
No.1throughNo.15in03_Materials. The material number matches the display page. - Replace the main color texture
In the Inspector’s lilToon settings, assign your image to the main color texture slot.
- Match the page name
Give the menu items titles matching your images so pages are easier to select in VRChat.
| Display page | Material to edit | Included image |
|---|---|---|
| 1〜3 | No.1〜No.3 | Three sample images |
| 4〜15 | No.4〜No.15 | Slots for your own images |
About the display aspect ratio
The original Prefab’s display is 16:10, which differs from the recommended 16:9 images. To preserve the image proportions, adjust the horizontal and vertical Scale and check that circles and text are not compressed horizontally.
For semi-transparent images, also check overlap with semi-transparent materials.
04 / MENU LABELS
Rename menu items
In the Hierarchy, open 表示メニュー (display menu) in the placed Prefab. Within 1~5ページ, 6~10ページ or 11~15ページ (page groups), rename objects such as 1.タイトル. These names retain the Japanese labels used in the product.
Display Support System
└─ 表示メニュー (display menu)
   └─ 1~5ページ (pages 1–5)
      ├─ 1.タイトル → 1.Opening
      ├─ 2.タイトル → 2.Song title
      └─ …
Keep the leading number to make matching with materials such as No.1 easier. Edit names only; leave page selection values and animations unchanged.
05 / PLACEMENT
Adjust position & size
Select the top-level Display Support System in the Hierarchy and adjust its Transform position, rotation and Scale. Place it where text is easy to read without obstructing your view.
For portrait images, adjust the horizontal and vertical Scale as needed. The in-game size control scales the display uniformly, so set its aspect ratio in Unity.
A guide to matching 16:9 images
If the unmodified display is 16:10 and the Prefab’s horizontal and vertical Scale are equal, multiply the horizontal Scale by approximately 1.111 to make it 16:9 (for example, X: 1 → about 1.111, with Y remaining 1). If you have already changed the ratio, do not apply this multiplier again; adjust while checking the image.
This guide covers the settings described in the original setup guide. Changing internal hierarchy names, animations or constraints is a separate modification beyond normal placement adjustments.
06 / FOLLOW TARGET
Set the follow target
By default, the display follows your avatar’s Armature. Depending on the avatar’s hierarchy and names, you may need to assign it manually.
- Select RootPosition
Select
RootPositioninsideDisplay Support Systemin the Hierarchy. - Check the MA Bone Proxy target
In the Inspector, check the target field of
MA Bone Proxy. - Assign the avatar’s Armature
If the target is missing or points elsewhere, assign the desired avatar’s
Armaturefrom the Hierarchy. - Check following in VRChat
With World Fix off, check that the display follows your movement and rotation.
07 / IN VRCHAT
Controls in VRChat
Use “表示メニュー” (display menu), added to your Expression Menu. Depending on your avatar’s existing menu structure, it may appear in a submenu.
| Menu item | Action |
|---|---|
| OFF | Hide the display. |
| 1~5 / 6~10 / 11~15ページ (page groups) | Select the page to display. |
| サイズ調整 (size adjustment) | Adjust to 1–2 times the size configured in Unity. |
| World Fix | Fix the display at its position in the world. Turn it off to resume following. |
The selected page is not saved; the initial display state is OFF. The size setting is saved. World Fix is off by default.
08 / SPECIFICATIONS
Specifications
| Platform | Avatars in PC VRChat |
|---|---|
| Visibility | Only the wearer (Local Only) |
| Page count | Up to 15 pages |
| Changing images | Configure images in Unity beforehand. |
| Samples | Three images. Users configure the remaining slots. |
| Initial display state | OFF |
| Size | 1–2 times the base size in VRChat. This setting is saved. |
| Follow target | Armature by default. Assign manually if needed. |
| Multiple displays | Page and size settings use shared parameter names. Independent control is outside the scope of this guide. |
09 / TROUBLESHOOTING
Troubleshooting
The display does not appear in VRChat
The initial state is OFF. Select a page from “表示メニュー” (display menu). If it still does not appear, check the page image, Prefab placement and follow target in Unity.
Pages 4–15 have no sample images
Only three sample images are included. For pages 4–15, assign your own images to No.4–No.15.
The display turns pink
Check that lilToon is installed. If you imported the product first, check the materials’ Shader fields after installing lilToon.
The display does not follow me
Turn off World Fix. If following still fails, check that the avatar’s Armature is assigned to the MA Bone Proxy on RootPosition.
Images look squashed or stretched
Match the display’s aspect ratio to the image. The original Prefab’s display is 16:10. See position and size adjustment for guidance on matching 16:9.
Overlapping semi-transparent hair or clothing causes visual issues
The drawing order of semi-transparent materials can change the appearance with angle and distance. Reduce transparent areas or try an image containing only text, then check the result on your avatar.
Can other people see it?
Only the wearer can see it. This display has no feature for sharing its contents with an audience.
Does it work on Quest?
This product is intended for PC VRChat.
Why is the initial state OFF when it is visible in Unity?
The Unity editor view and the initial VRChat state differ. In VRChat, select a display page from the Expression Menu.
Checking the Animator in Unity
Enable the Animator component on Display Support System. For normal VRChat use, leave it disabled as configured in the included Prefab.
Can I use more than 15 pages?
This product supports up to 15 pages. Contact support if you are considering using more.
10 / NOTES
Usage notes
Scope of this guide
This guide covers the currently distributed Display Support System v1.0.0, based on its included setup guide and v1.0 product files.
Supported adjustments
You can adjust position, rotation, size, follow target, images and menu titles. Changing internal hierarchies or animations may affect operation. Modifications outside the normal settings are not covered by the included setup guide’s operation guarantee.
Reimporting after configuration
Reimporting the same product files after editing images, materials or the Prefab may overwrite your settings with defaults. Back up your images and modified project first. v1.0.0 does not include a process that automatically preserves settings during an update.
Using multiple displays
Page switching and size adjustment use shared parameter names. There is no feature for selecting separate pages or sizes for each display.
11 / SUPPORT
Contact & license
For setup, operation, bugs or feature requests, use the contact form.
Include your Unity and dependency versions, the selected page, the operation causing trouble, and screenshots of relevant settings or Console errors to help us investigate.
Please check the BOOTH product page for the license that applies to this product.